Hey Prompt Entrepreneur,
In this Part we’re going to translate all our work into an actual joinable membership community.
We’ll discuss available tools, decide a platform and get the basics in place ready to receive your members.
Let’s get started:
Setting up your membership platform
1. Choosing your platform
Our first big task is to choose how we are going to host our community.
There are three basic categories here:
- free, using non-community focused platforms
- self-hosted, self-built
- premium, using a community focused platform
Free options include hosting your community in a WhatsApp, Telegram or Discord group.
These tools are free to use and give you an instant community group out of the box. Discord in particular has a full set of community admin features.
The main issue with these sort of platforms ism that are built primarily for free communities – not for membership communities.
We’re building our community as part of our business – to sell access to the higher tiers of the community and be able to sell other products and services. Free tools like Discord limit our ability to do so.
Self-hosted, self-built communities are generally built on a website using WordPress or a similar technology.
A good example is WordPress with Buddypress and Buddyboss. I’ve personally used this option a few times and it works well whilst remaining cost-effective.
However, it’s also a lot more technically complex! If you are the sort of person who can build your own community then go for it.
If you need to first upskill to learn how to build a community don’t waste your time. Your time can be far better spent working on your business in higher impact areas.
Finally, premium options. The big two here would be Circle or Mighty.
These are paid platforms that are specifically for building membership communities.
Both are great platforms and will likely cover your needs.
I recommend you review the features and pricing of both of them alongside your community structure to check if what you need is provided.
You can also use this prompt to assist you:
Act as a technology advisor.

Compare this feature description of an online membership community business I am building against the the feature sets of two tools I am considering.

Here is the structure of the community:
[copy/paste community structure]
Here is the feature list of tool 1:
[copy/paste features]
Here is the feature list of tool 2:
[copy/paste features]
Provide a tabular matrix of features requires vs. features that each tool provides. And a written analysis of which tool would best suit my business needs.
For the features of the tools go to the Pricing page or whichever page has the most detailed feature list. Simply copy and paste the whole page into ChatGPT. ChatGPT will be able to sort the details out.
You may find that ChatGPT hits input limits. If this is the case use GPT-4 Advanced Data Analysis tool or Claude2. Or alternatively ask ChatGPT to run one analysis at a time and then combine results into the final table and analysis.
💬 Prompt Output:
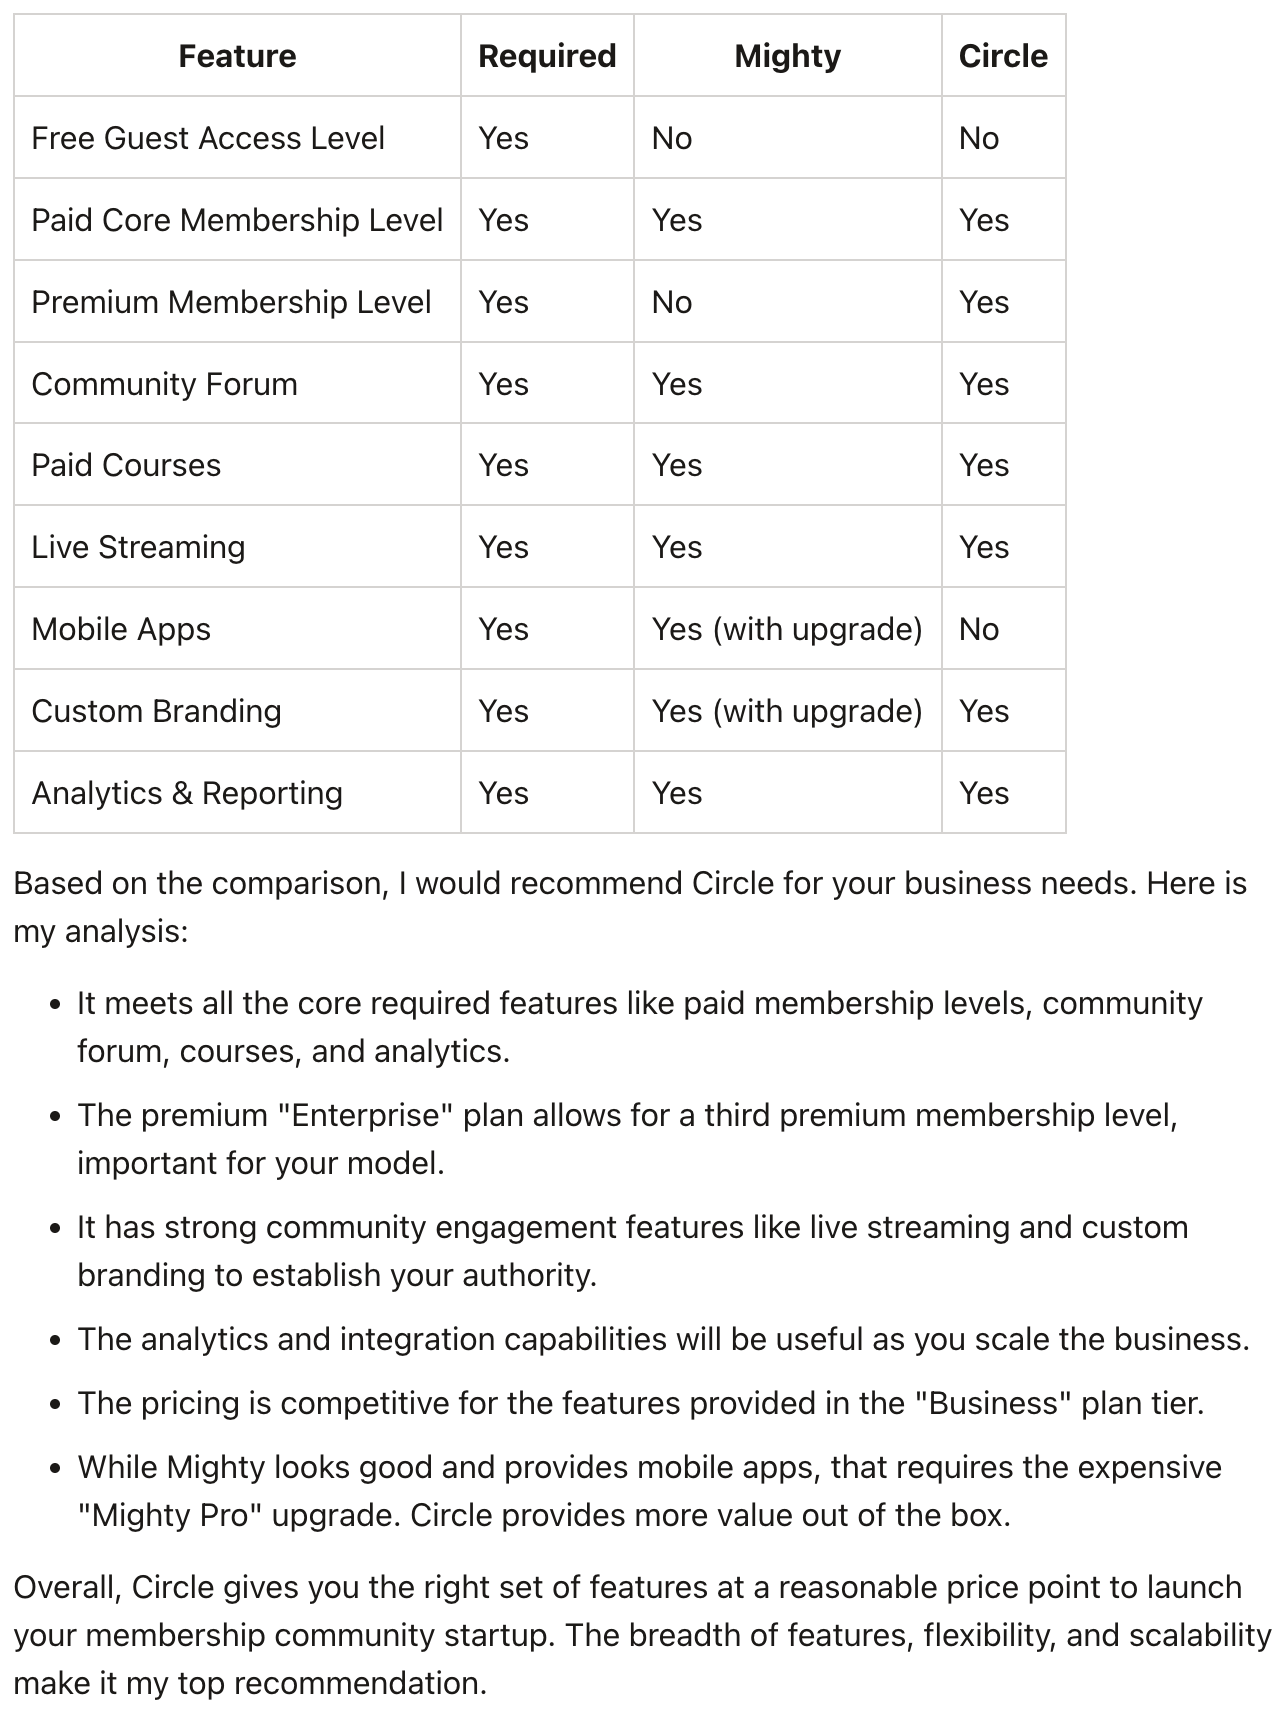
In this output I fed in the specific course structure of the Copywriting Academy community that I’ve been using as an example.
This shows that Circle is the better choice for the specific requirements of that community.
Make sure to sense check this with manual investigation as ChatGPT can miss details.
I know for example that Circle has a mobile app that allows all users to access the community easily on a phone. But ChatGPT has missed that in its analysis. Remember to check results before making big decisions!
For the rest of this Part I’ll be using Circle for the examples. That said, the basics are the same whether you are using Circle, Mighty, self-hosted or a free platform like Discord.
Set up an account and go through the basic walkthrough of naming the community, adding a logo and other standard procedures. Circle has good articles on doing all this so I won’t waste your time repeating it all!
2. Setting up tiered channels
Once the basic setup is done one of the main tasks we need to tackle is setting up the structure of our community.
We do this through the channels.
Each channel has a specific function.
For example we might have one channel to welcome new members, another to announce up coming live sessions and one to talk about industry news.
The purpose of channels is to split the chat into different areas so that members stay on topic.
The alternative here is a WhatsApp group where everyone basically talks about anything and everything all at once. Chaos.
We will not only set up our channels but also group them by our tiers – free, core and premium. This lets us get the backbone of the community in place.
Here’s a prompt to get started:
Act as a membership community management expert

Based on the provided community structure

Suggest the groupings on Channels and channel categories.
[copy paste community structure]
💬 Prompt Output:
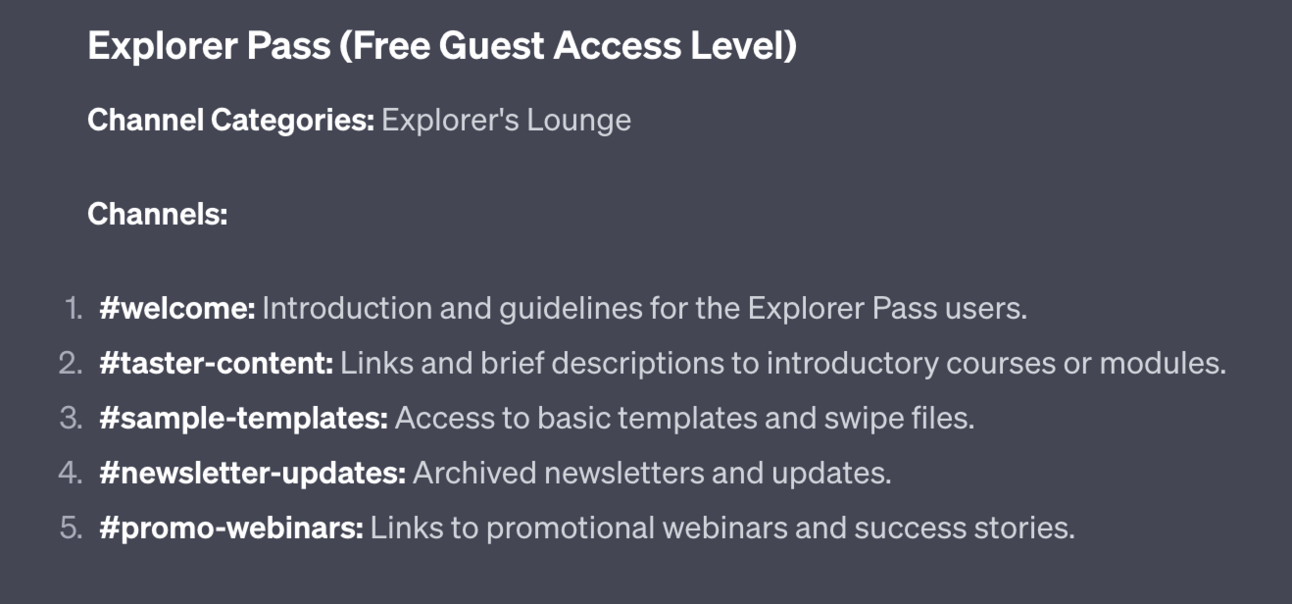
First up ChatGPT gives us our free access level. This one is nice and simple with a Welcome, taster, swipe file, newsletter and webinar channel.
I would change the names of these to make them sound less salesy. For example I’d change “Taster-content” to “Start here” and “promo-webinars” to simply “webinars”.
In Circle we would now create an Space Group called “Explorer Pass” and then individual Spaces for each of the channels:
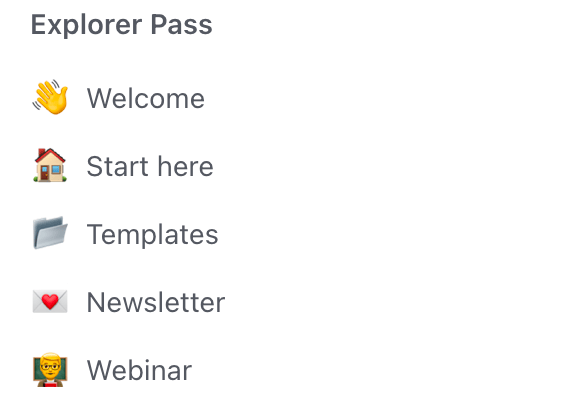
In Circle you can set the type of Space. Here I’ve used Chat for “Welcome” and Events for “Webinar”. The rest are basic Posts type Spaces.
The terminology for this will be different in Discord, Mighty or whatever tool you choose to use but the basic idea will be the same – a way to split your content into channels.
ChatGPT also gave me the core and premium levels. Here’s the core level:
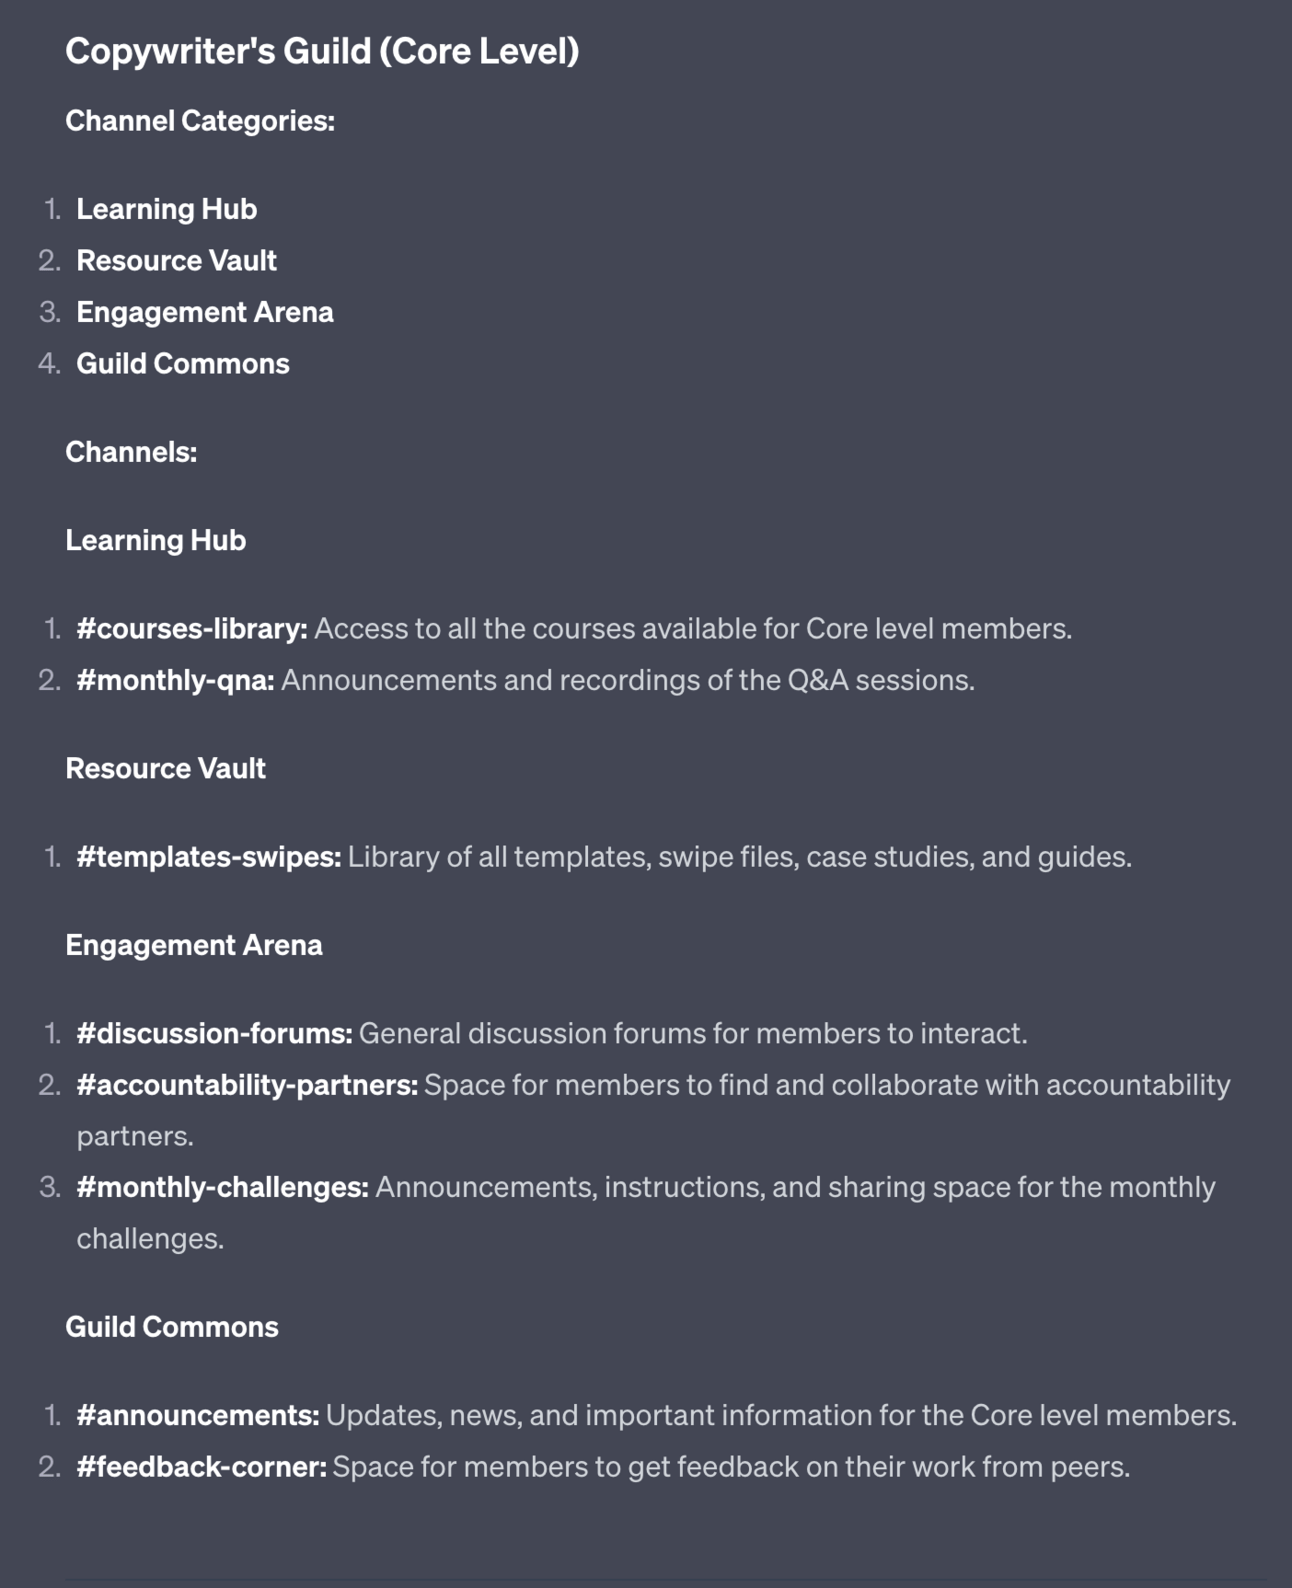
Notice that this is split into 4 Categories (Space Groups in Circle) rather than 1. This makes sense – there’s a lot more detail here at the paid level so channels are more broken up across different categories.
Continue to build out your community structure based on the channels provided by ChatGPT.
3. Sticky Posts
For most channels we want to have a “Sticky” post that introduces what the channel is and what it should be used for.
This post will stay at the top of the channel, hence sticky.
Writing these posts can be time consuming when making this many channels. So let’s use a prompt to get the basics done.
Use this below your existing work on the channel structuring for ease:
Act as an expert community manager.

Write a sticky post to help new members orientate to the channel [#channel-name]

Use the following community details for context in your post but do not explicitly refer to these details:

[copy paste values, vision, mission, big idea]
Copy and paste in the values, vision, mission and big idea that we generated in the last Part.
Plug in the channel name that you want to generate text for. In this case it’s #welcome.
💬 Prompt Output:
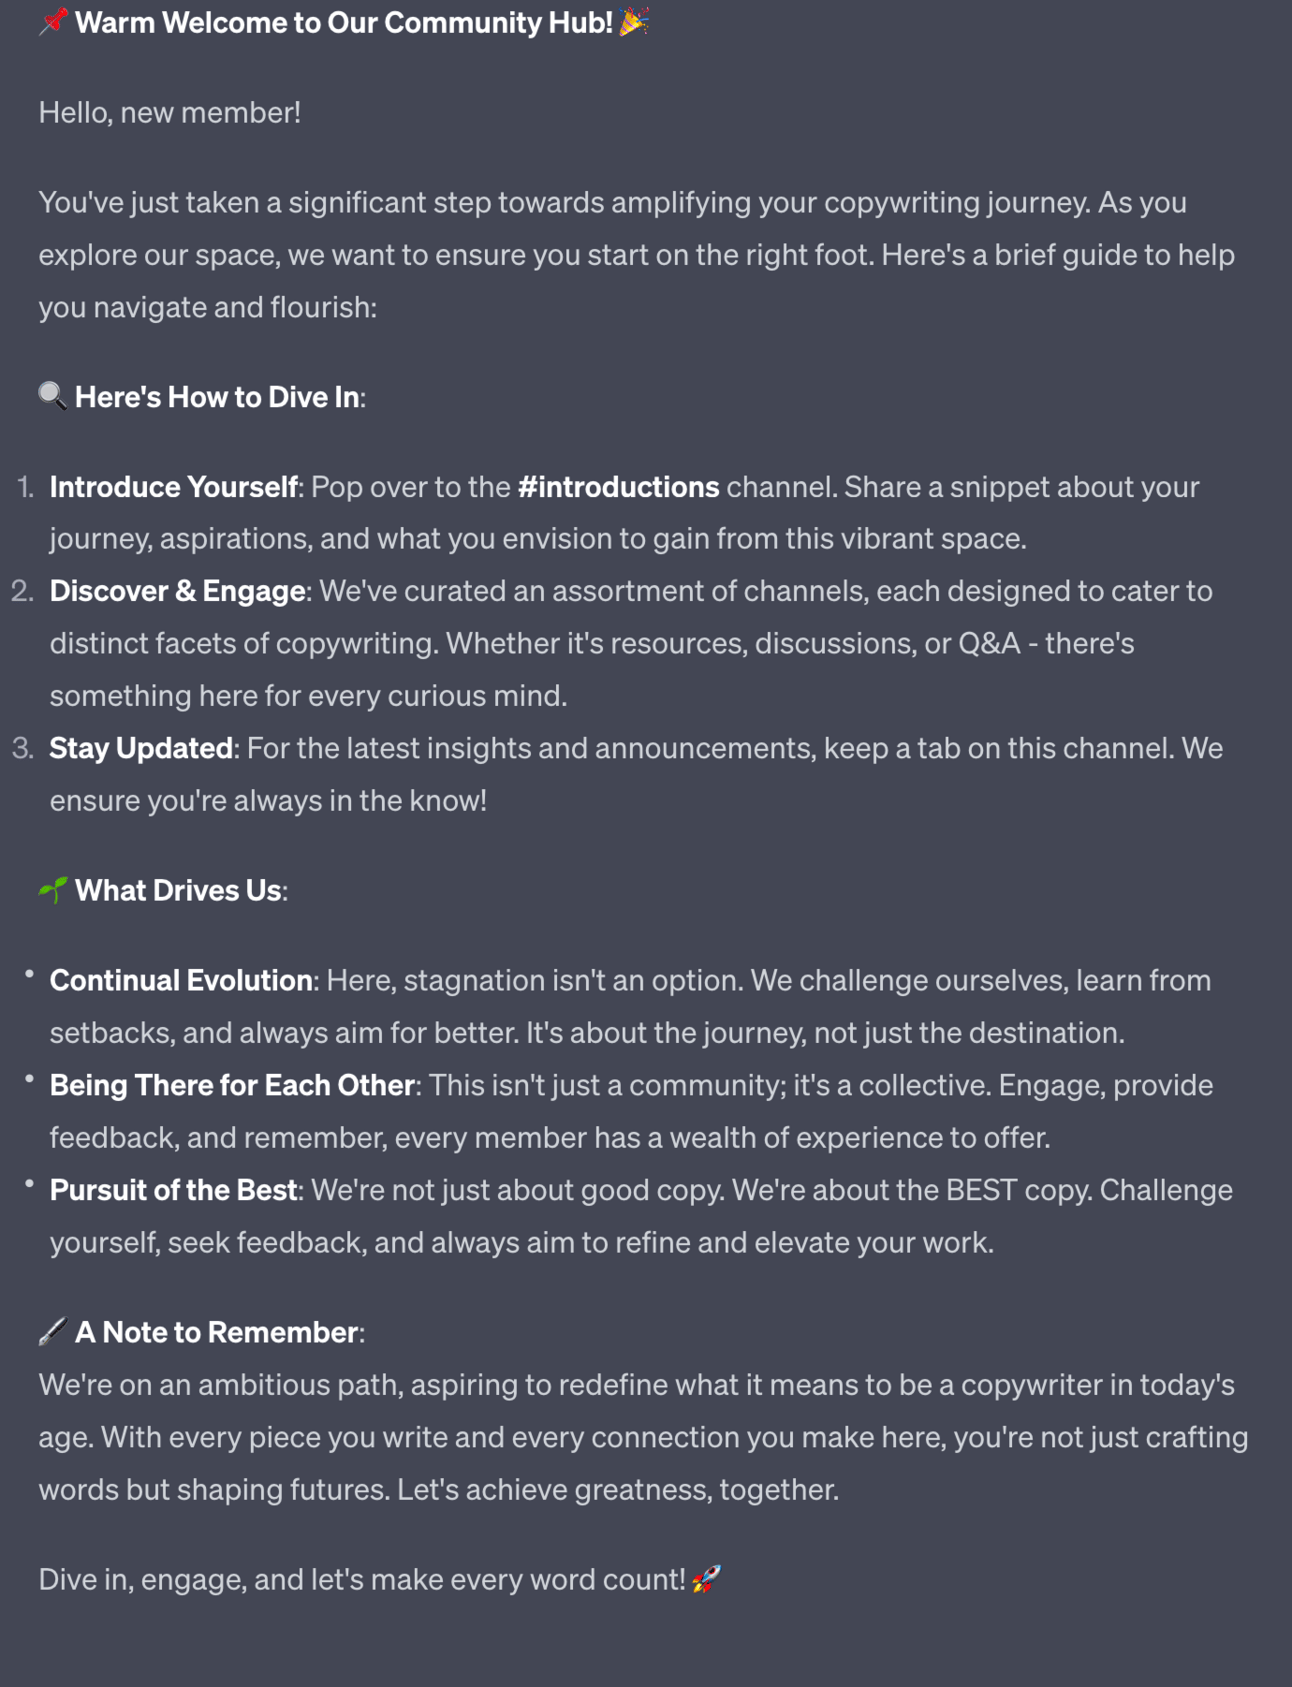
Continue to run this process with different channel names to get all of the sticky posts you need.
4. Set up payments
You now need to set up tier levels so that some content is available for free and others require payment.
For free Spaces do this:
- Select the Space
- Click the dropdown next to the Space name
- Find Customise
- In Customise you can set Access to “Open”
This allow any member (free and paid) to access the Space.
For paid levels we need to set up billing with Stripe or a similar tool.
Once set up:
- Select the Space
- Click the dropdown next to the Space name
- Find customise
- Set Access to Private
- Go back to the dropdown
- Select Paywall
- Set up payment details
- Repeat for each Space
Once that’s done we’ve done the main mechanical parts of setting up our community!

6. Premium Prompt – Intro Video Course
Free Trial – Premium
A strong early asset in your community is having a short course that your new members can work through.
A lot of membership community tools, Circle included, have strong LMS (Learning Management System) tools in place.
Having a very short, easily consumable course at the front end of your community allows you to do several things at once:
- introduce yourself, personally, on video.
- provide a hit of early, easily digestible value
- hammer home the values of the community
- hint at more exciting features in higher levels
Here’s a short prompt to generate a video series. Use this below your existing work from before or alternatively copy/paste in your community structure:
Based on the community structure

Design a short 3 video course.

Each video is 5 minutes, straight to camera, no slides required.

The purpose should be to engage new members, provide some core value and excite them about the higher levels of the community.
💬 Prompt Output:
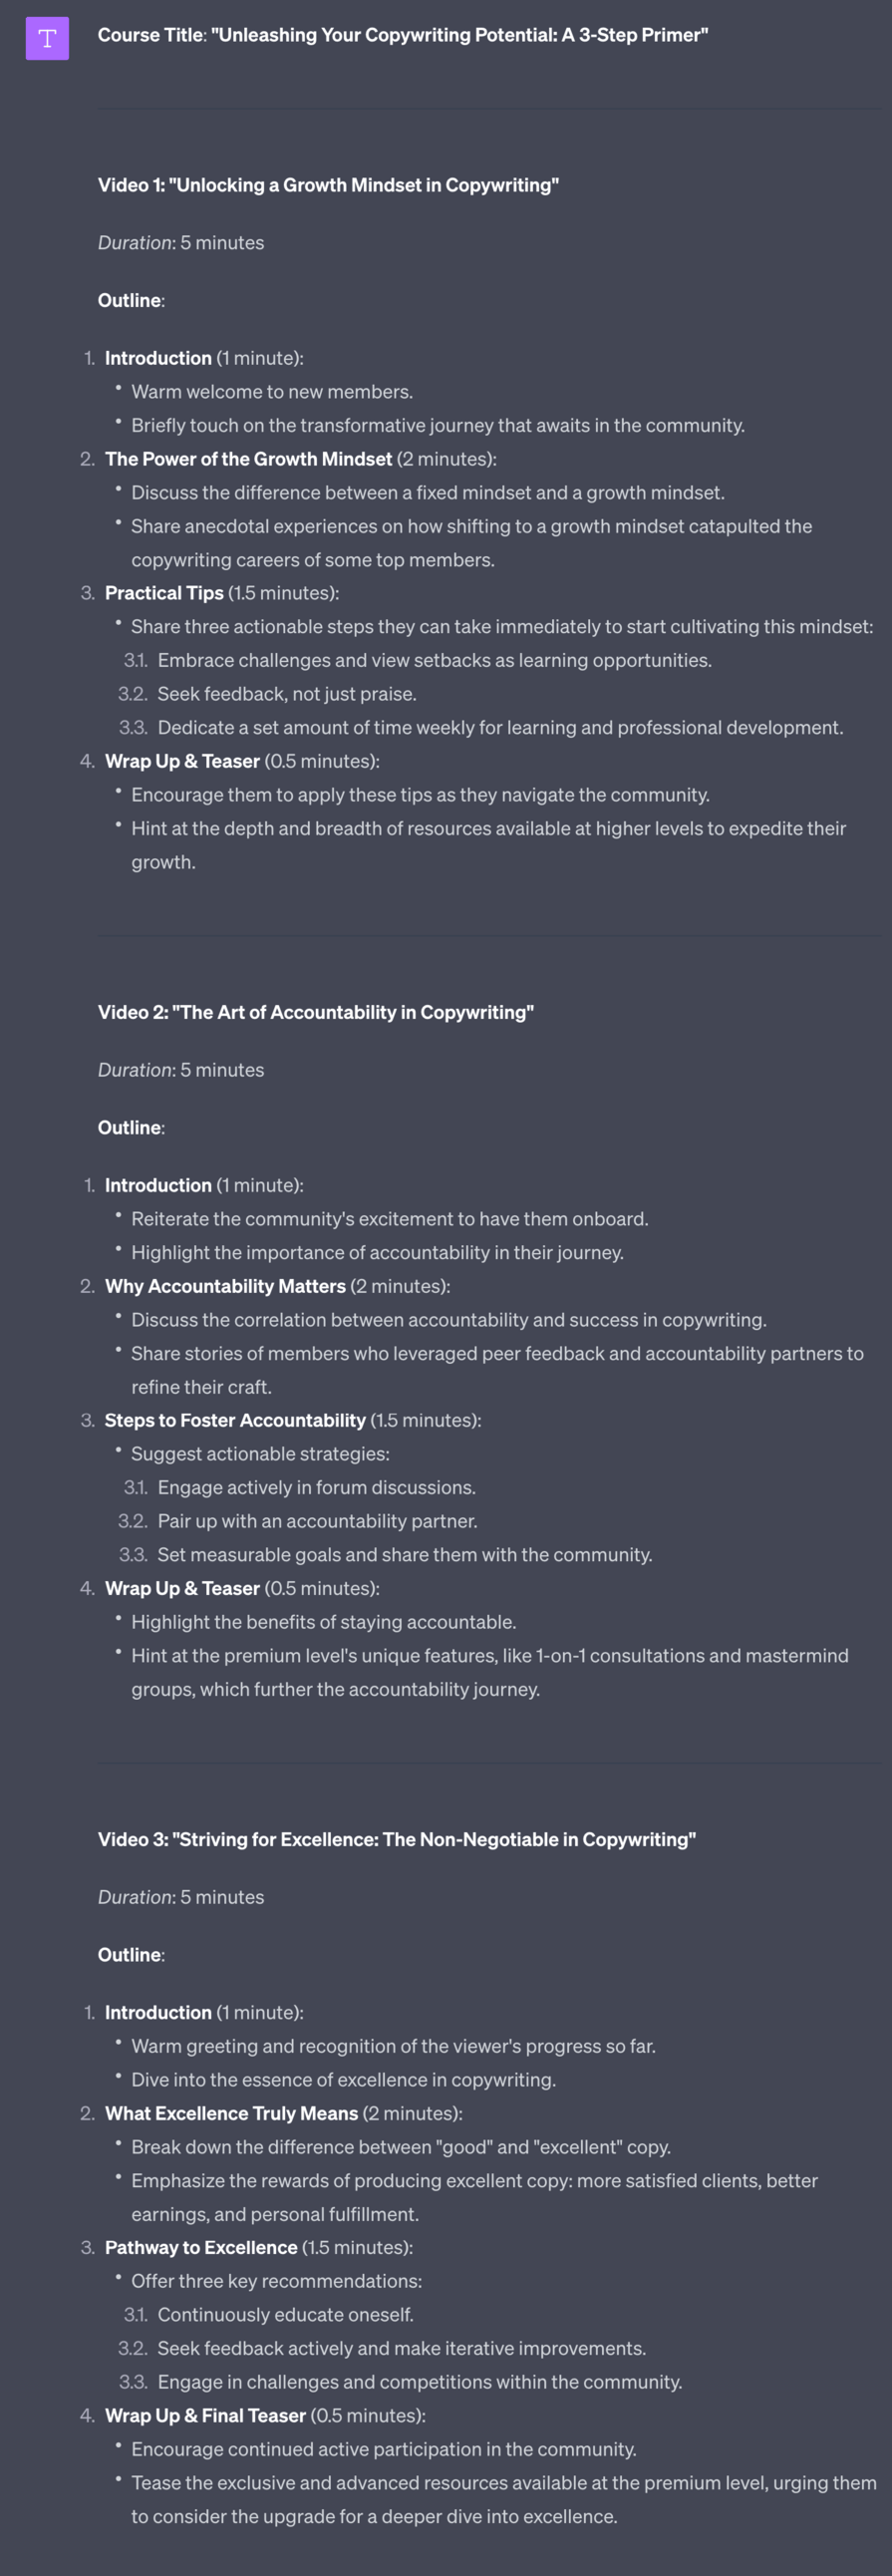
If you need to you can ask ChatGPT for full scripts too. I recommend just using these notes and talking to camera though. It’ll lead to a more natural video.
These videos don’t need to be a highly produced course – it’s simply an introduction series so people can settle in. The more authentic the better!
If you do want to produce a fully fledged course (using AI to make the process easier) I’ve written a detailed guide – you can find the PDF, Notion document, checklists and more in your member’s area.
Pulling it together
In this Part we’ve got the basic machinery in place for our community.
Next up we’re going to start building the real value of the group by adding people! We’ll be covering launching and growing the community in the next Part.
A reminder of what we’re covering this week :
Part 1: Deciding our community’s value
Part 2: Building the tribe
Part 3: Setting up your membership platform
Part 4: Launching and growing your community
Part 5: Monetising your paid community
See you tomorrow Prompt Entrepreneur!
Until then, keep PROMPTING!
Kyle
